In our previous posts we have learned Setting up your PC for Android development and Configuring AVD in Eclipse. In this post, Let us create your First Android Application by Creating a Project in Eclipse. Creating an Android Application is a very simple process if you have already setup the IDE and SDK. Follow these simple steps to create your first Android Application.
Step by Step
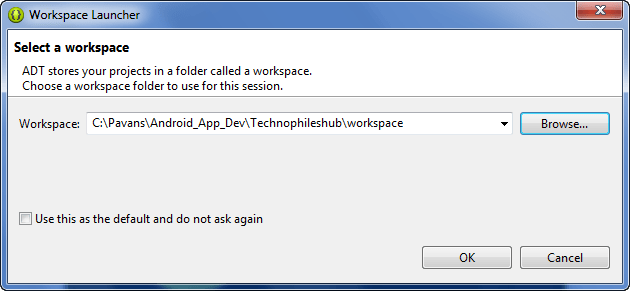
- Open your Eclipse IDE, It will open Workspace Launcher window asking for folder path of workspace. Workspace is the location where all your projects files will be stored and optionally you can set this as default location for your workspace.
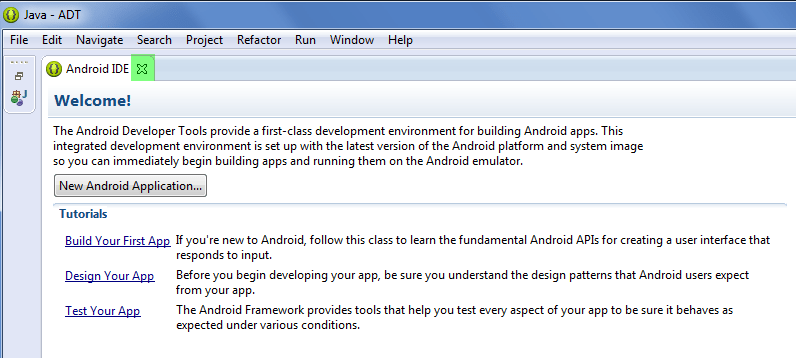
- As you continue, It will open up the ADT Welcome message which includes tutorial links from Android Developers blog and a button for starting your first Android Project.
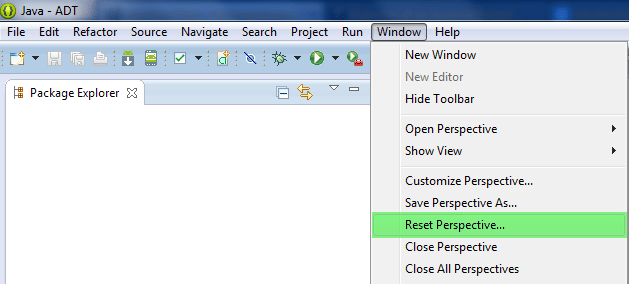
- Let’s go ahead and close the window and “Reset the Perspective” from “Window” menu so that all of us are on the same page.
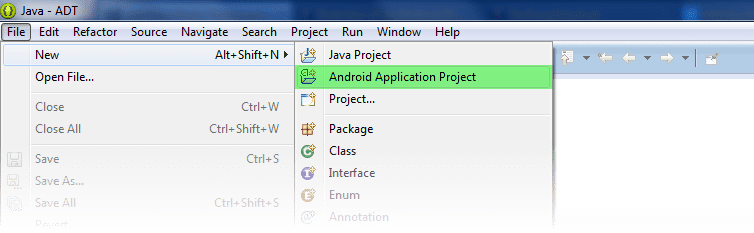
- Now select “New Android Application Project” from “File->New” to Create an Android Project
- It will take you to “New Android Application” Project screen where in you need to provide
| Application Name | Name of the Application that you want to create |
| Project Name | It is the directory name under which all your application files will be stored. |
| Package Name | This is the name of the bundle in which your objects are grouped. It should be unique across all the packages installed on the Android system so that each object can be uniquely accessed using this namespace. |
| Minimum Required SDK | It is the lowest version of Android that your app supports. To support as many devices as possible you may want to select the lowest version available but on the contrary you will be cutting down your app features to support the lowest version. |
| Target SDK | It is the highest version of the Android that your app supports. |
| Compile With | It indicates the version using which you want to compile your Android Application. |
| Theme | Each theme will have its own user interface style and the selected user interface style will be applied to your Application. |
Since it is your first Android Project, you need not worry about these options for now and provide any details and click next to continue. 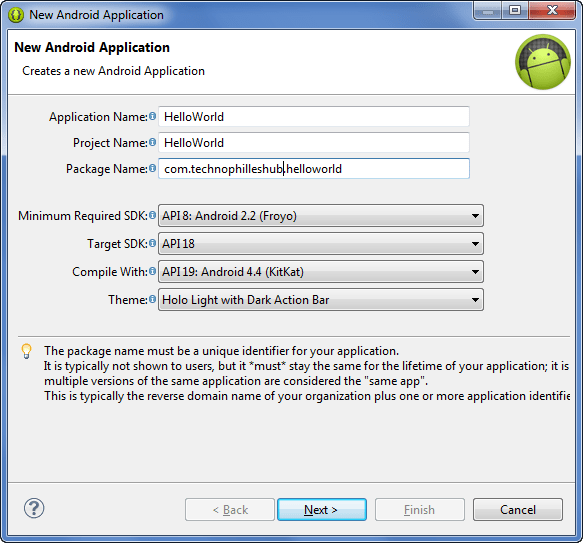
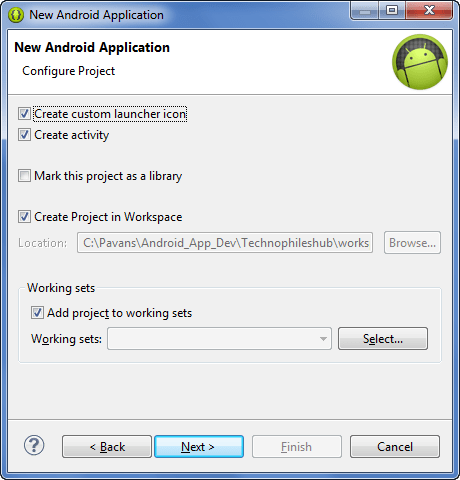
- Once you click on Continue you will be taken to Project Configurations page where you have options for Custom Launcher Icon, Activity and other options like making this project as library or adding the project to existing worksets. For now just click on next to continue.
| Creating Custom Launcher Icon | The Logo for your Application. |
| Creating Activity | Initial Screen for your Application |
- As we have selected the option for creating “Custom Launcher Icon”, It will take us to the “Custom Launcher” icon configuration page where you have to provide the Application logo path.
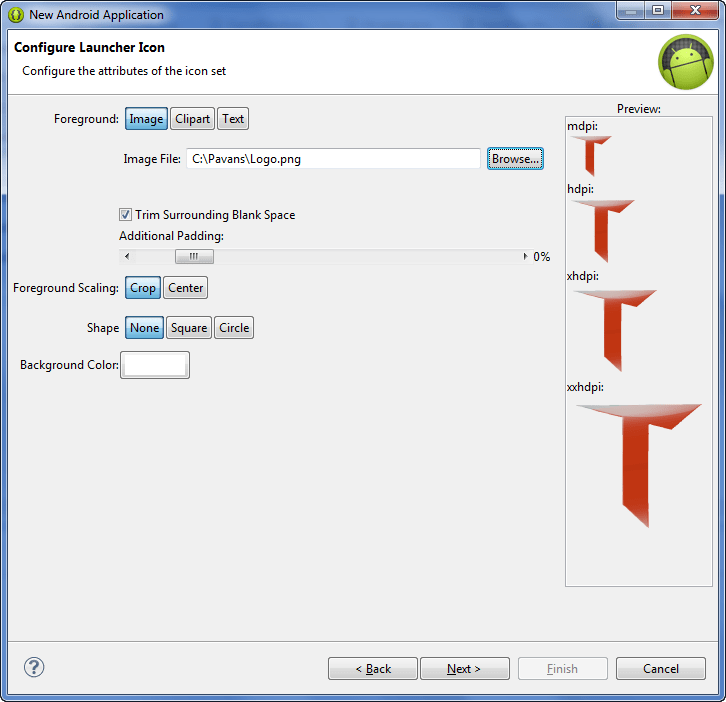
- Keep note of this MDPI, HDPI, XHDPI & XXHDPI, we will talk more about these different DPI’s in the next blog post. After this step the next step is Creating an Activity. As per Android Developers page
An Activity is an application component that provides a screen with which users can interact in order to do something, such as dial the phone, take a photo, send an email, or view a map. Each activity is given a window in which to draw its user interface. The window typically fills the screen, but may be smaller than the screen and float on top of other windows.
- At this stage think of an “Activity” as the Screen that you see on your mobile, we will learn more about Activities in future blog posts. In the screen that you have provided with, there are 3 different options
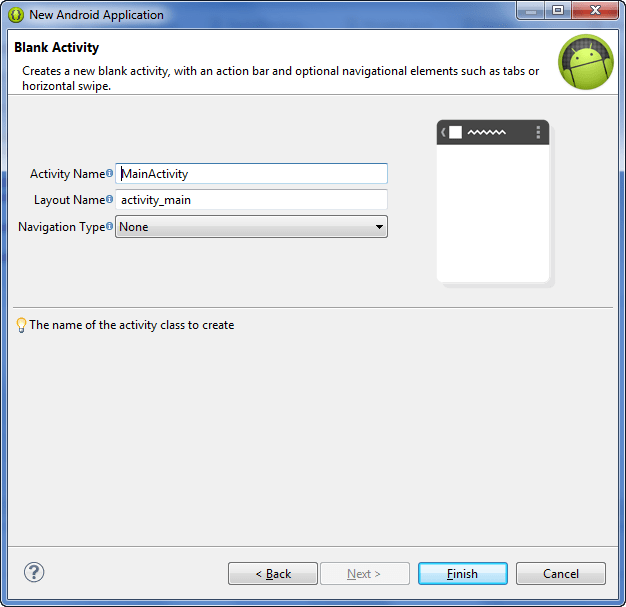
- Blank Activity – Contains only Action & Navigational Elements.
- Full screen Activity – Hides System UI and Action bar but toggles when you hover.
- Master/Detail Flow – Creates two different Activities with two columns. Best suited for tablets and requires minimum SDK version of 11.
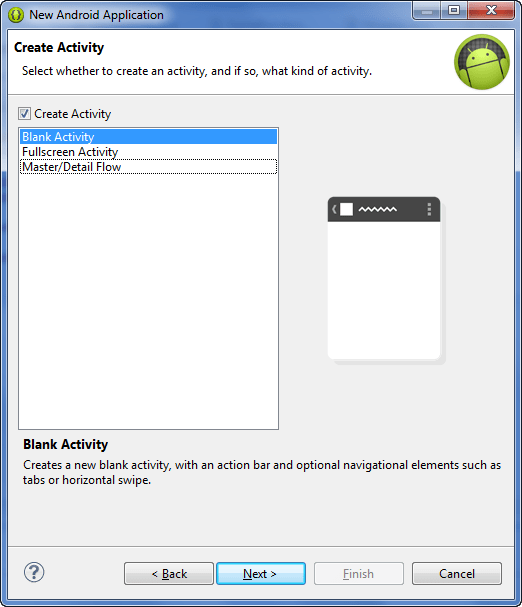
- Click “Next” selecting “Blank Activity” this will take you to, one last and final step, where you need to provide “Activity Name” and “Layout Name” for the Activity that you just have created. By Layout Name we are referring to an XML file that provides the layout for the “Activity” that you have created.
 That is all we need to do create our first Android Project. As soon as you click on Finish, ADT will open the Activity layout file “activity_main.xml” and the “MainActivity.java” files allowing you to start developing. Now you can directly test the Application you have created by running the application on Virtual Device that we have created as per the earlier post or on the Physical device that you have with you. In some cases you might need to Run Configurations first to run your application. Please comment below if you have any queries/suggestions.